So I’ve used minis to help make a number of presents over the years, although I usually concentrate on foodstuffs that people would be excited about.
Last year we were traveling (which was great) but it put a damper in any DIY present plans.
This year, I had a little inspiration (and time) for some projects as presents for family, which was great!
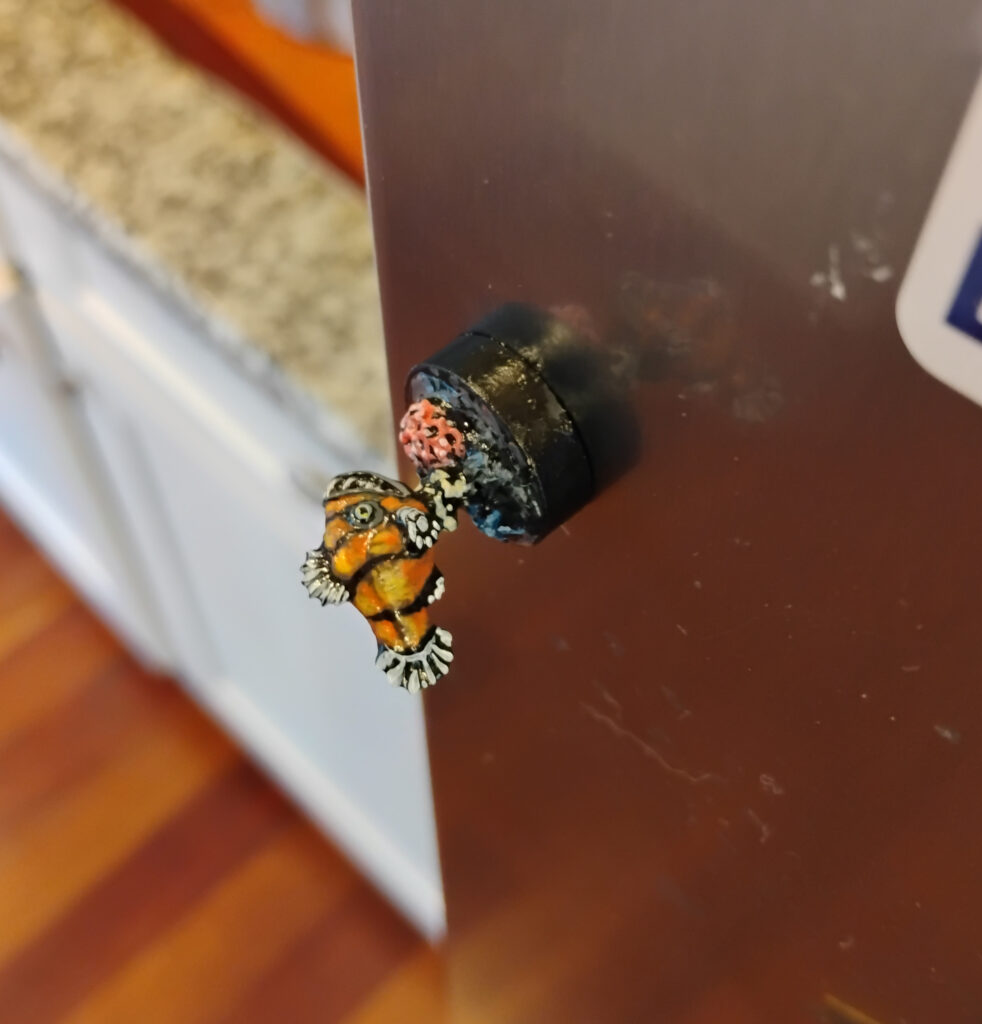
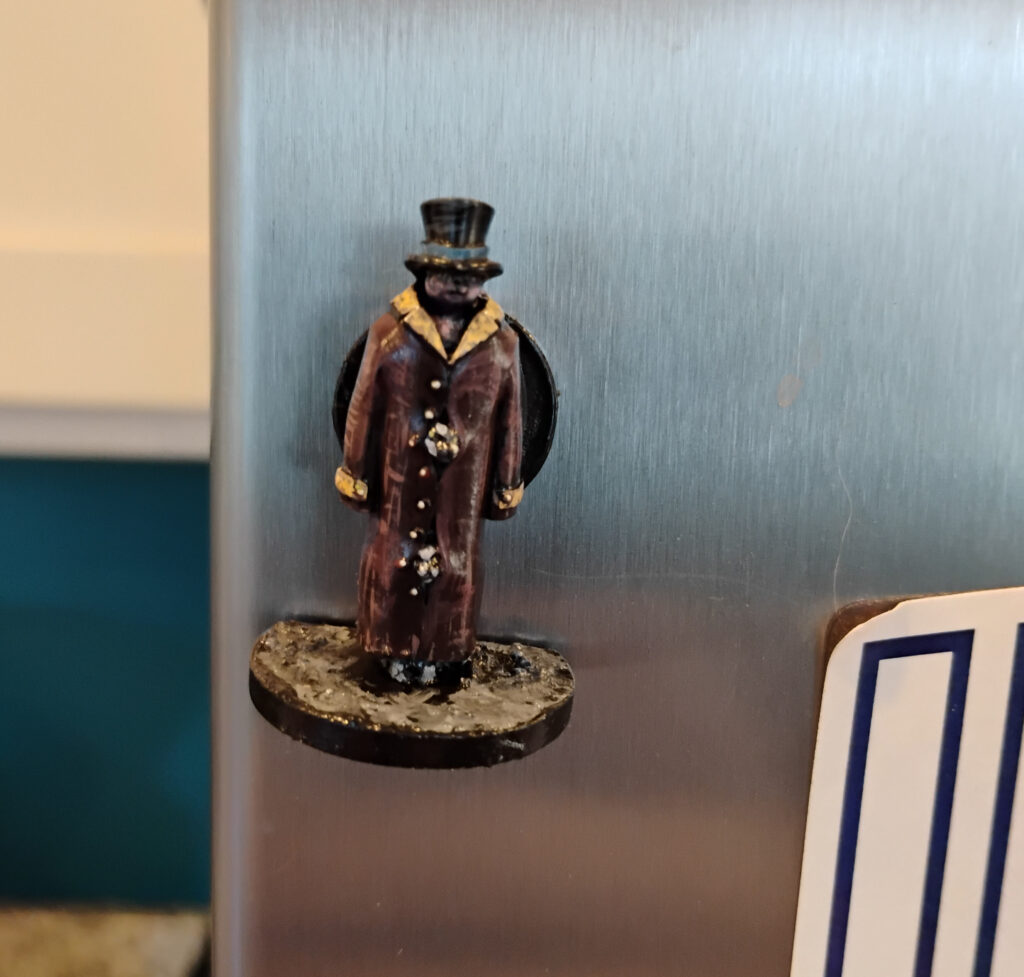
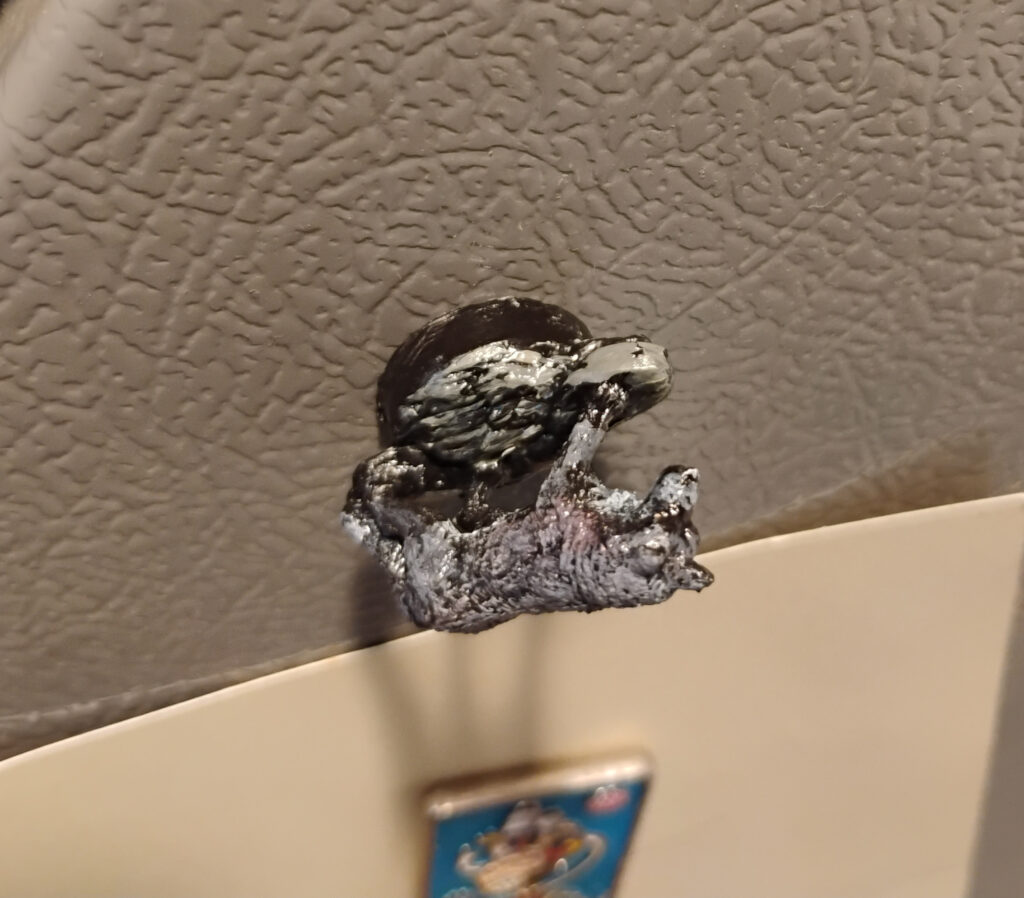
Magnets
A quick and easy DIY project was some little fridge magnets for folks! The idea is simple- pick a mini that someone would be into (preferably a pretty solid metal or plastic mini) and glue it to a magnet, and paint it! I used E6000 to afix to the magnet and varnished generously, leaving it a little glossy, which will hopefully help with wear and tear.
Ornaments
So I was home for Thanksgiving, helping my folks set up some Christmas decorations when we were snowed the Saturday after.
I grew up with a number of these ornaments in my house, which were made by my maternal Grandmother and her friend. They apparently made a lot of these for friends at their church, family, and such. They’re pretty neat- made out of eggshells, decorated with various beads and crafting supplies, often with little scenes on the inside.
I’ve always liked them, but I grew up with them and kind of took them for granted. But I was reflecting on how much I really enjoyed these and I don’t see this kind of work that often. I was reflecting on how a lot of the little tiny world stuff I’m enjoying now connects back to these little ornaments.
Ornaments by my maternal Grandmother and her friend, that have been out at every holiday I can remember!
So I figured I’d try some modern materials and see how it goes!
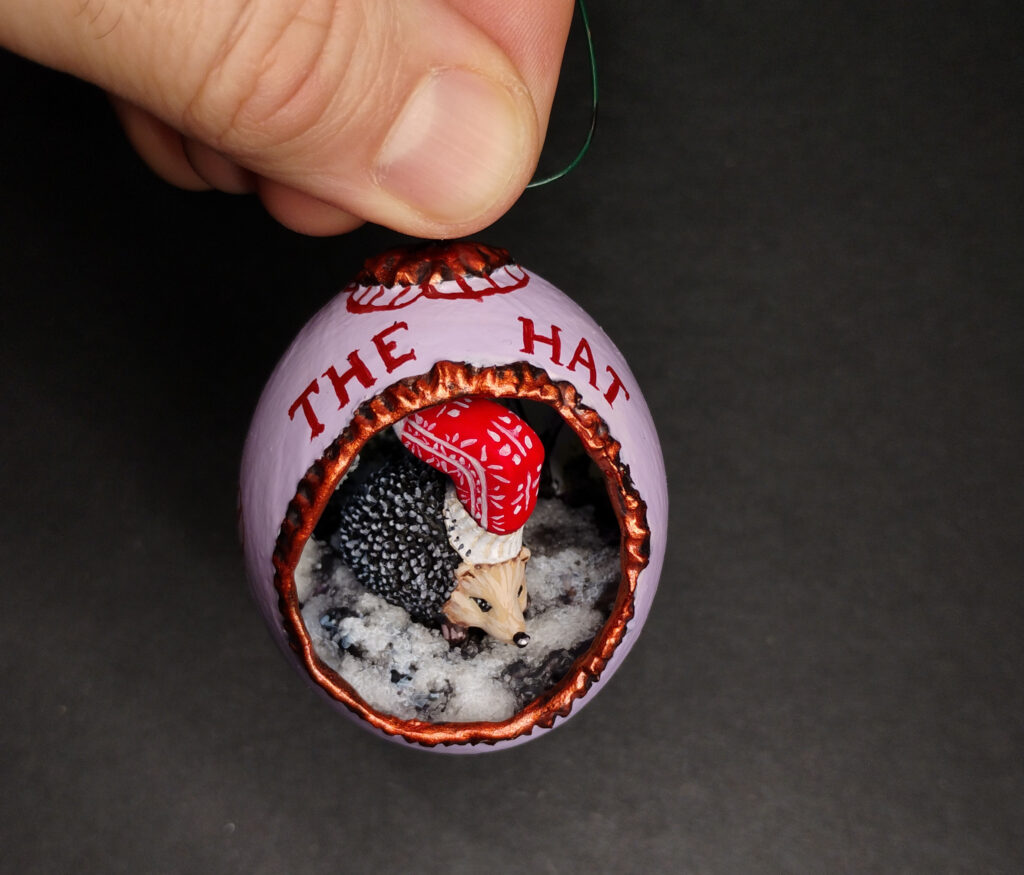
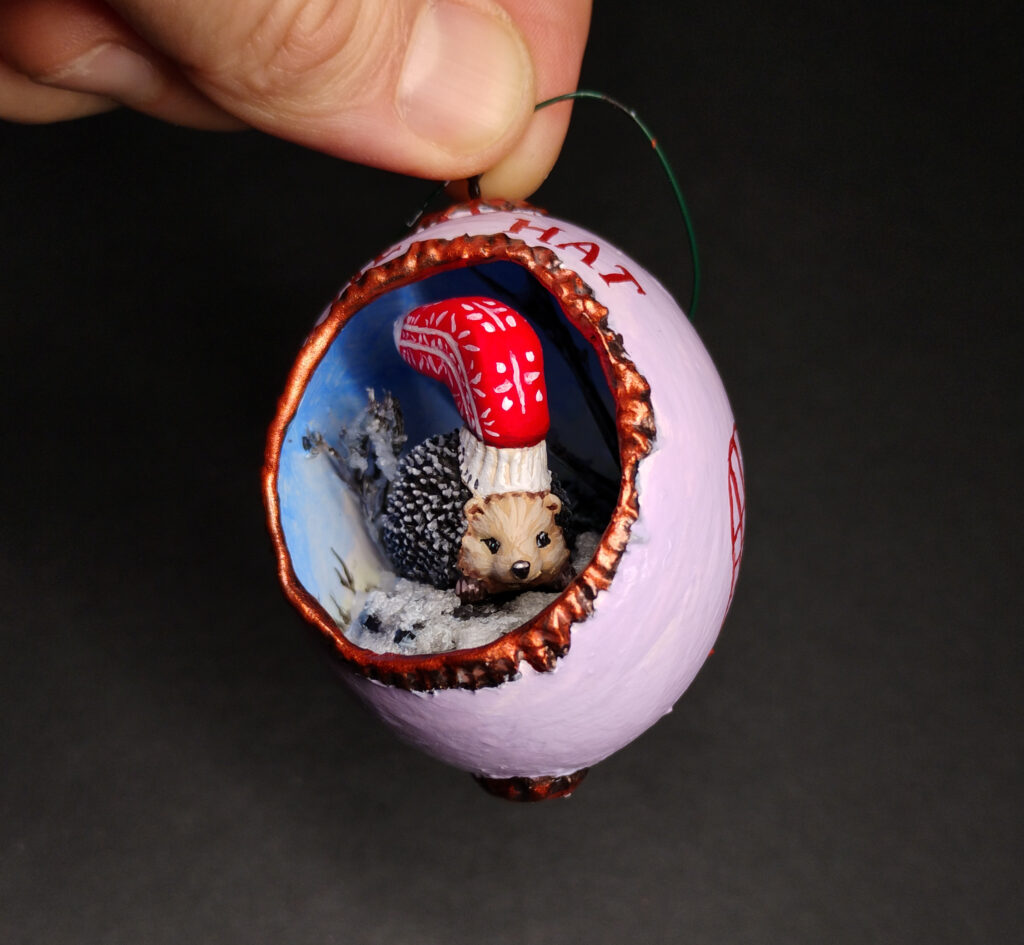
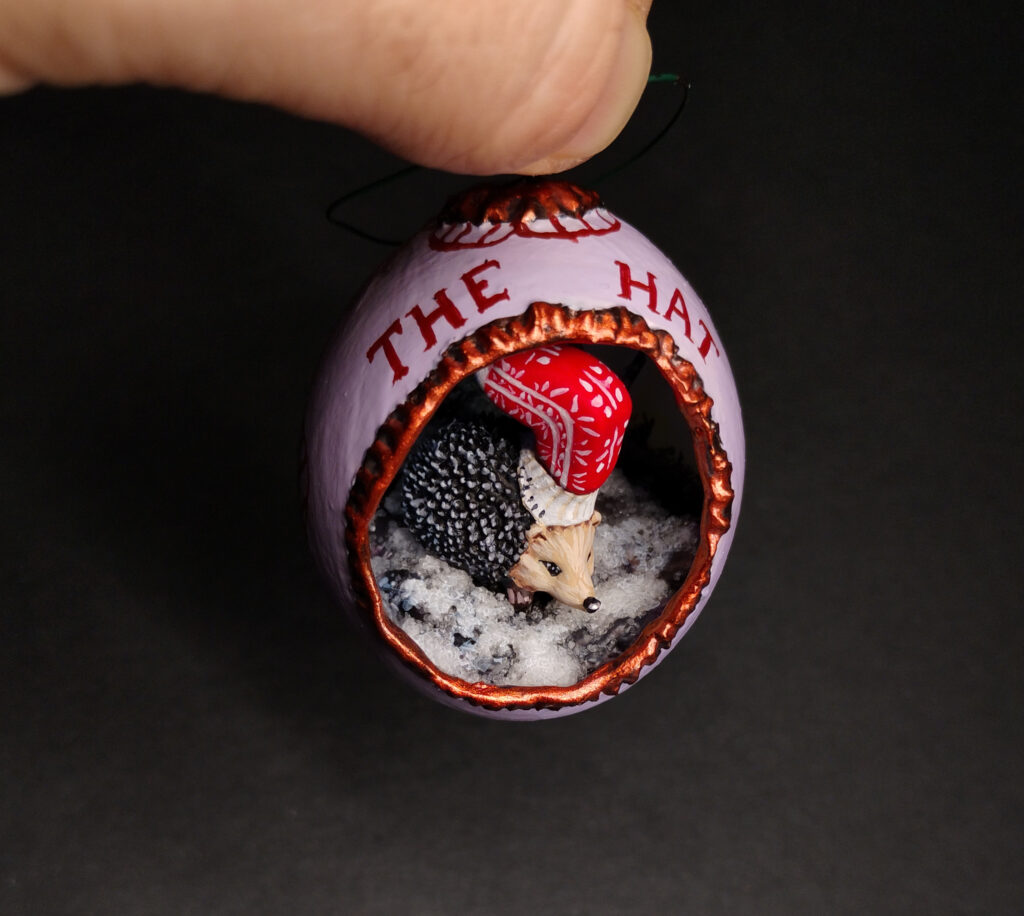
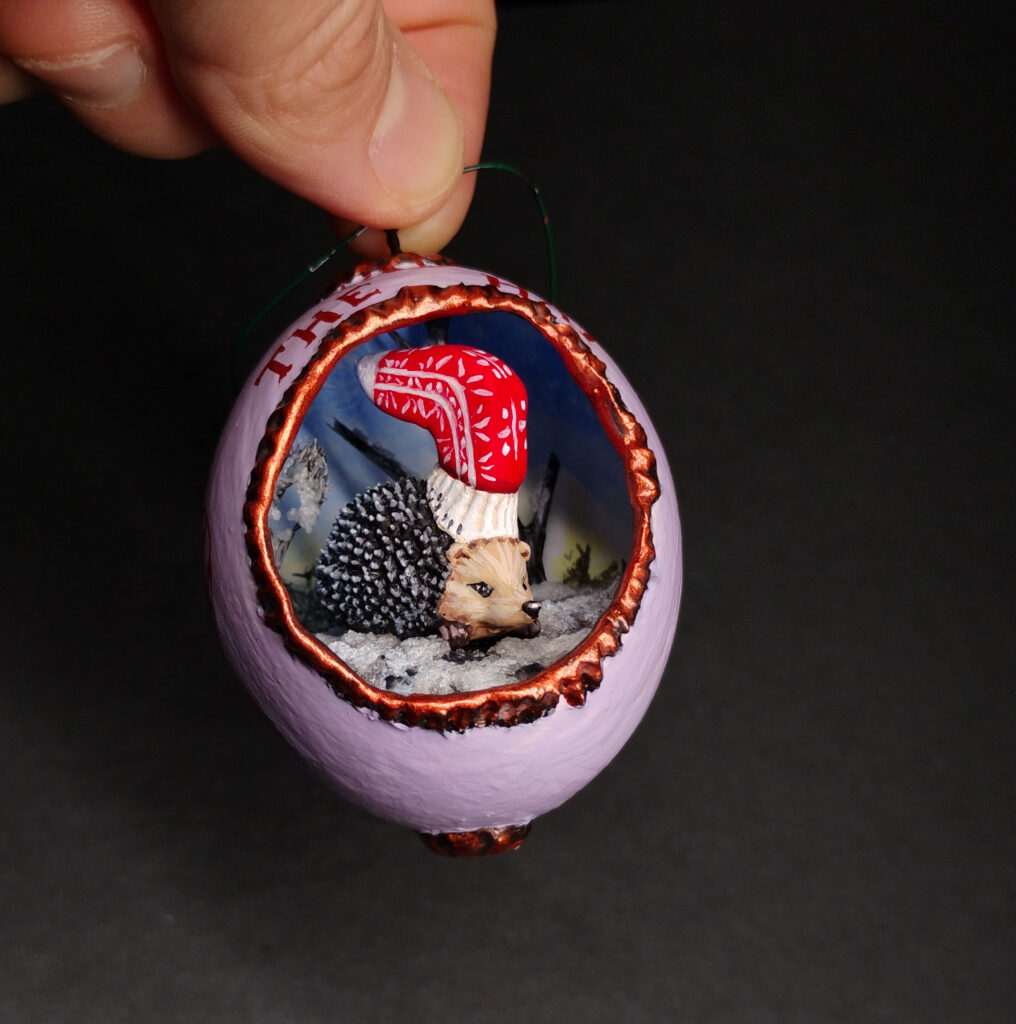
First, I thought of a theme that my mother would enjoy. Two sprung into my mind- White Christmas, her favorite Christmas movie, and the children’s books of Jan Brett. In particular the one where the hedgehog has a sock stuck to its head.
First, I would need some eggs! I did some reading on tutorials for blown egg ornaments, and a video might be helpful for you to watch too.
To prep the eggs, you want
- Jumbo eggs (the largest you can find)
- Modge Podge (or watered down PVA)
- Sharp-point exacto knife
- A bit of wire, or a paperclip
- Blue painters tape (or some other less sticky tape)
- A bowl
Seal the eggs with Modge Podge- this is to get a bit of insurance on cracking the shell.
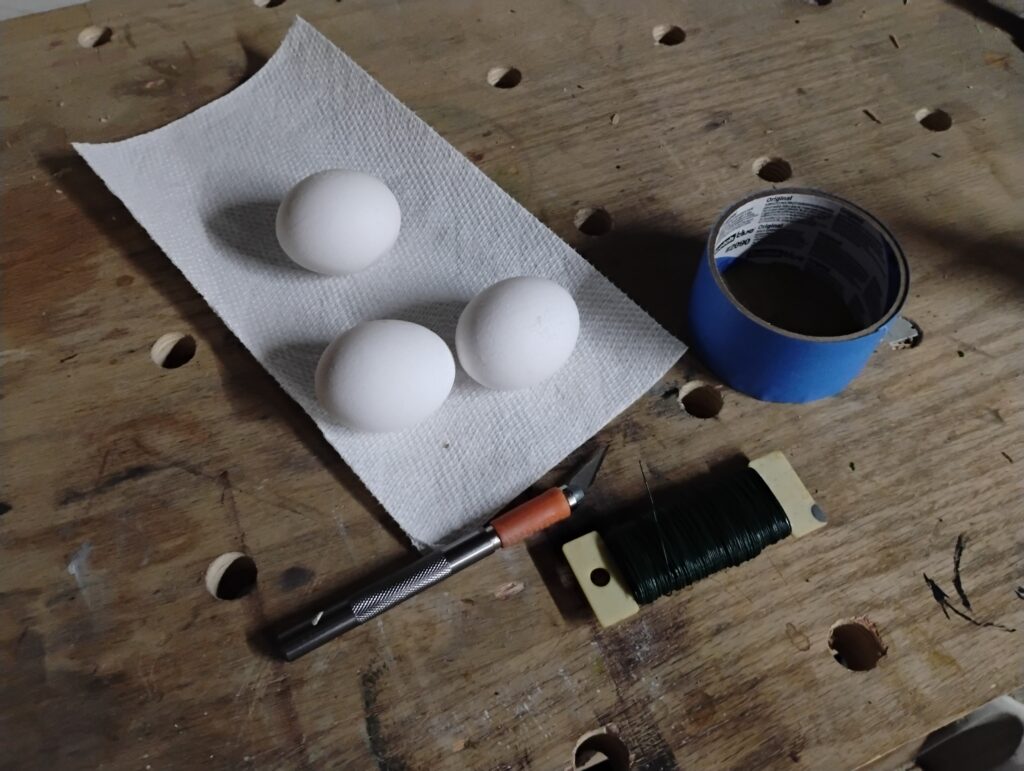
The tools assembled- the exacto is for drilling the hole, the wire for scrambling the egg, and the tape helps prevent cracking!
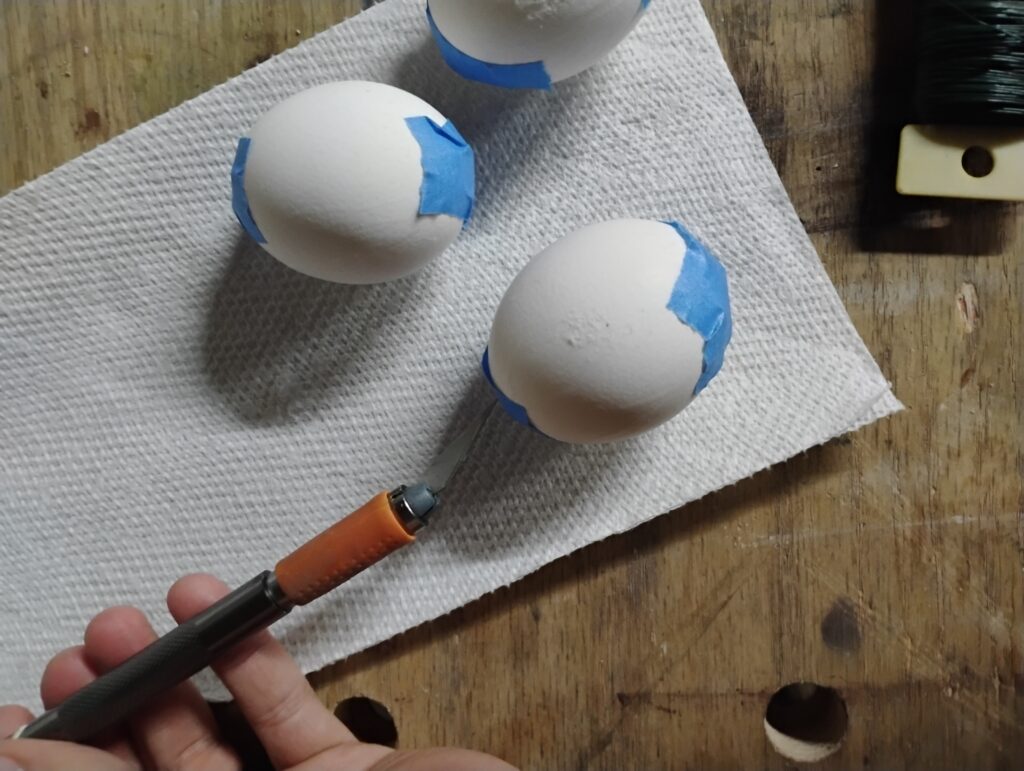
Apply the tape, and use the exacto to drill a small hole, about 1.5 times the diameter of your wire, into both ends. I just eyeballed the approximate poles, as it gets fixed in the next step.

Scramble the egg using your wire through the hole.
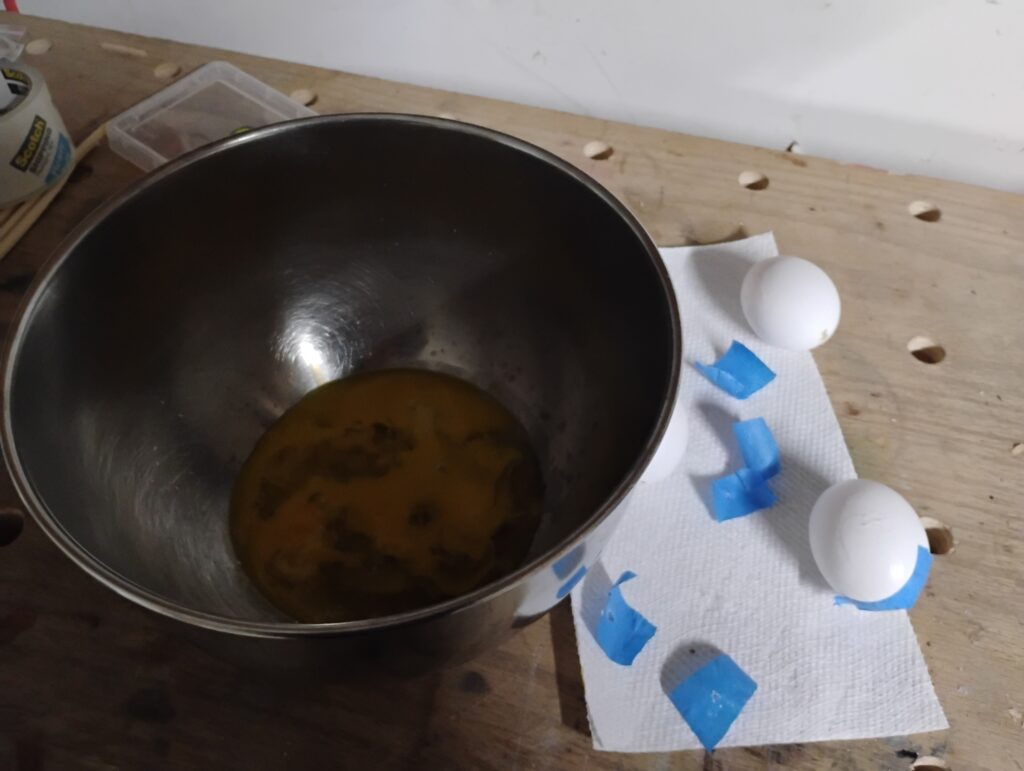
Then, using your mouth (the samonella probably won’t kill you- https://www.fda.gov/food/outbreaks-foodborne-illness/outbreak-investigation-salmonella-eggs-june-2025) blow super hard- it will start to slowly push out the bottom. You can scramble more to help the process. Blow until its just air coming out the other side! This took me a while and a lot of air, probably there are ways to speed this up!
Building the diorama
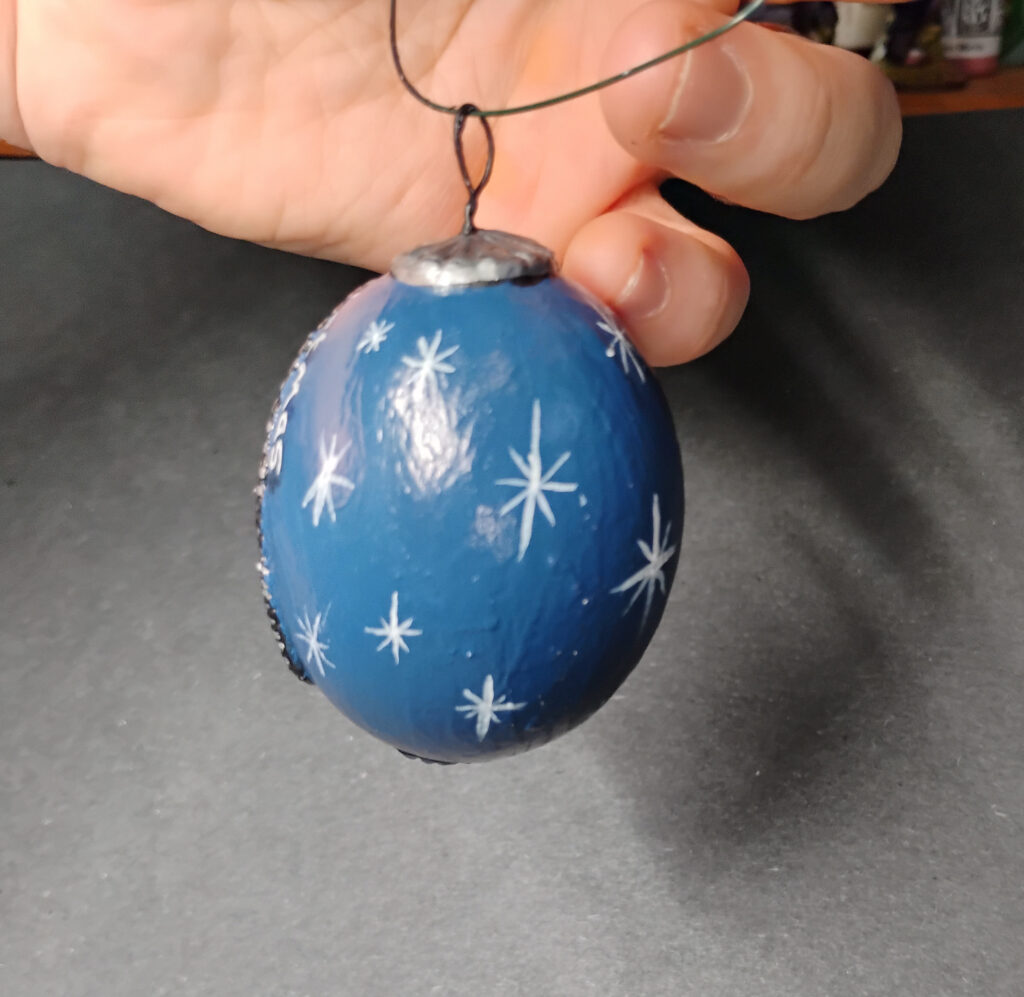
Now the eggs are ready for shaping. Get a super sharp exacto and a marker. Look at your egg and consider your scene a bit- do you want an oval window, something more like a stage? It makes sense to be symmetric left to right in most cases, but some top-bottom asymmetry might help set the scene (and the egg isn’t symmetric that way either). I decided the narrow part of the egg would be the top for mine.
Then using an exacto, patiently trace the line a few times, working your way around. This is also a bit tedious and needs patience. I’d plan to have a spare egg as well, and go slow.
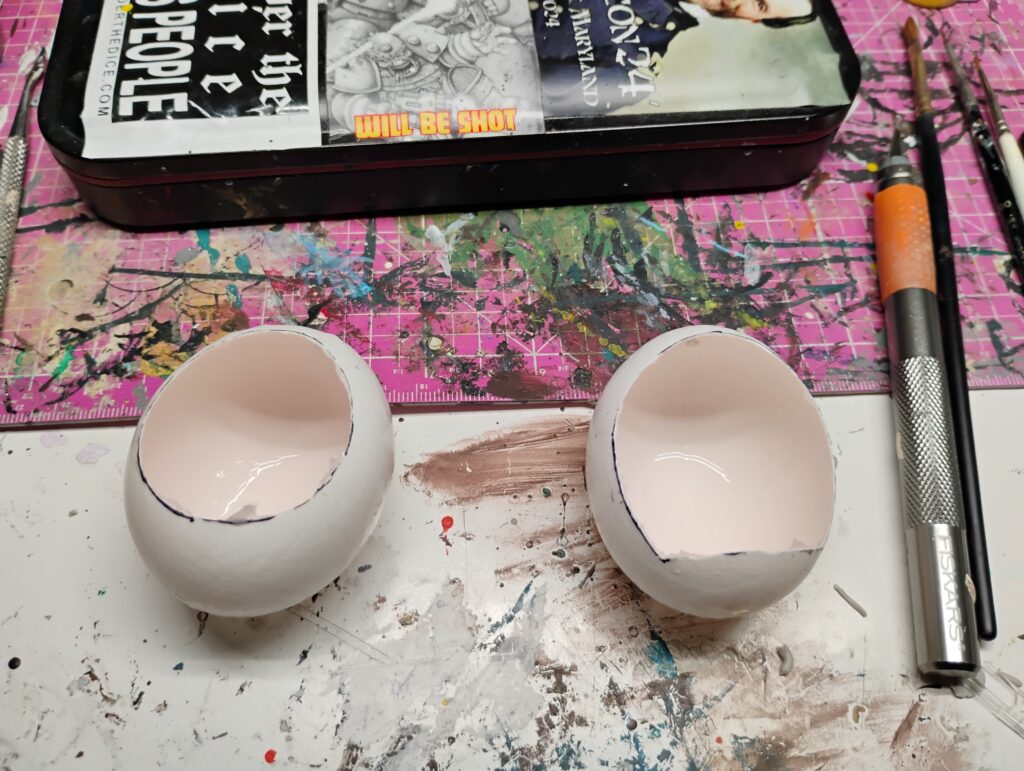
Then, with the egg open, I gently washed out the inside and let it dry- giving us a clean eggshell. I then sealed the inside, and the outside again (why not) with that Modge Podge.
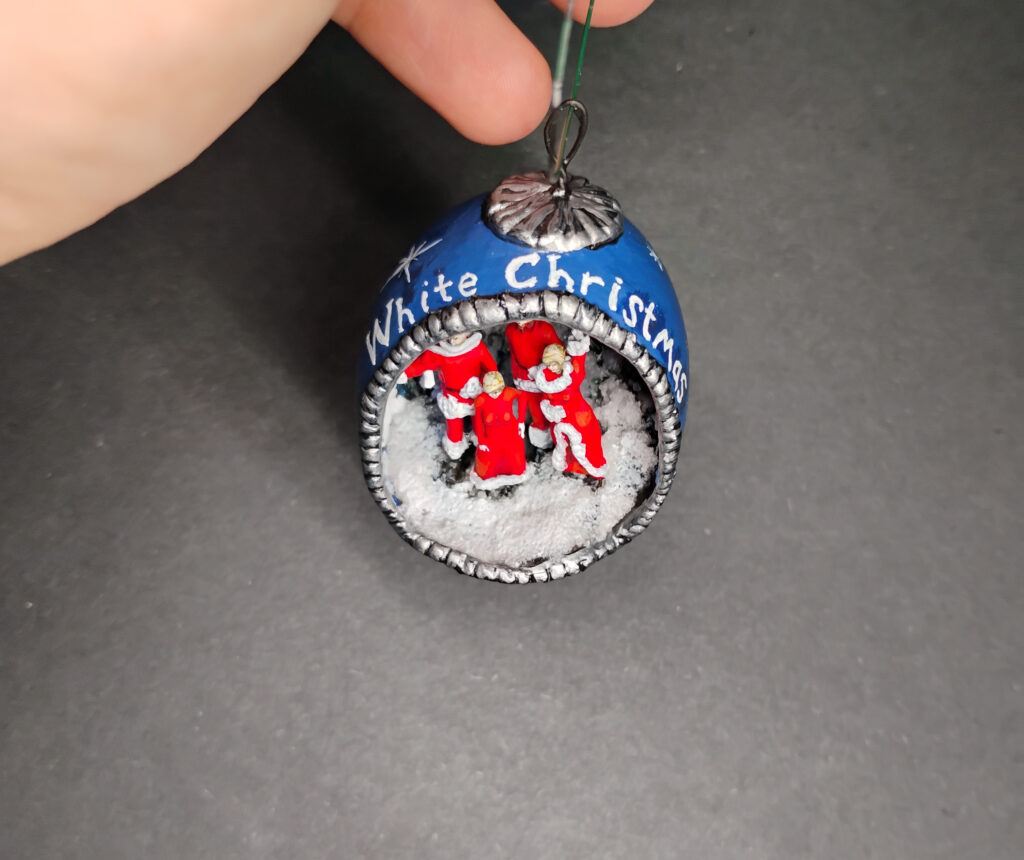
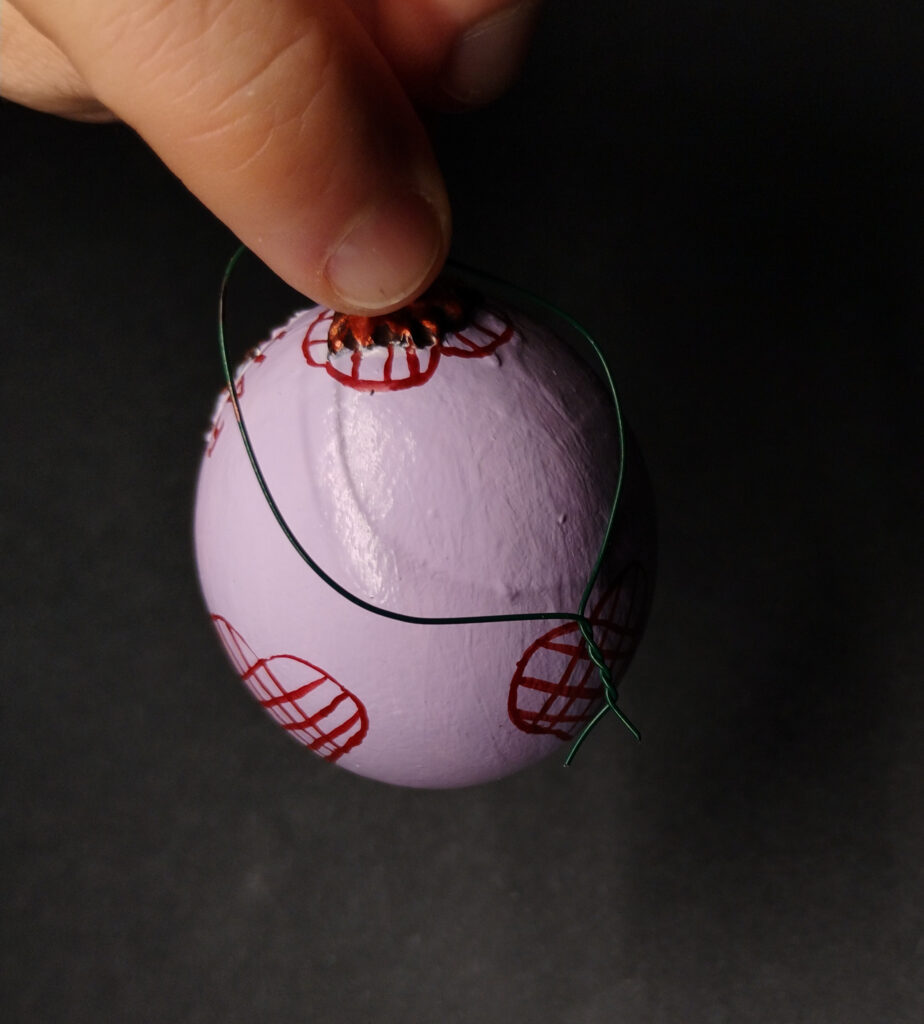
In my Grandmother’s old examples, they used various ribbons and beads to make the borders and trim. You’ll need some kind of plan for this, but since I didn’t have a lot of spare bits of that sort, I decided to just sculpt something. Using Aves Apoxiesculpt, I made a border around the hole with some abstract details. I also made a top and bottom decoration. This added a bit of flair and also covered the whole from earlier. Not that in the top, before I did that, I threaded and twisted some wire through the hole, gluing it in place to make a hanging hook.
You can now use this hook to help hang it from something in future steps as it dries, which is great!
I did slightly different designs between the two to help mix it up.
Then, I balled up some tinfoil and superglued it into the egg to form a base for the diorama.
On top of this, I scooped spackle and more Aves Apoxiesculpt to create a ground.
I then went to my terrain material and got some small sticks and lichen, which I used to build a simple background (since its small, I wouldn’t go too hog wild- I concentrated on delineating the background from the foreground with some brush).
I put most of that in with PVA glue, and let it all dry (smearing liberally onto the egg- I hope layers of glue and paint help this hold together).
I then gesso-ed the whole thing.

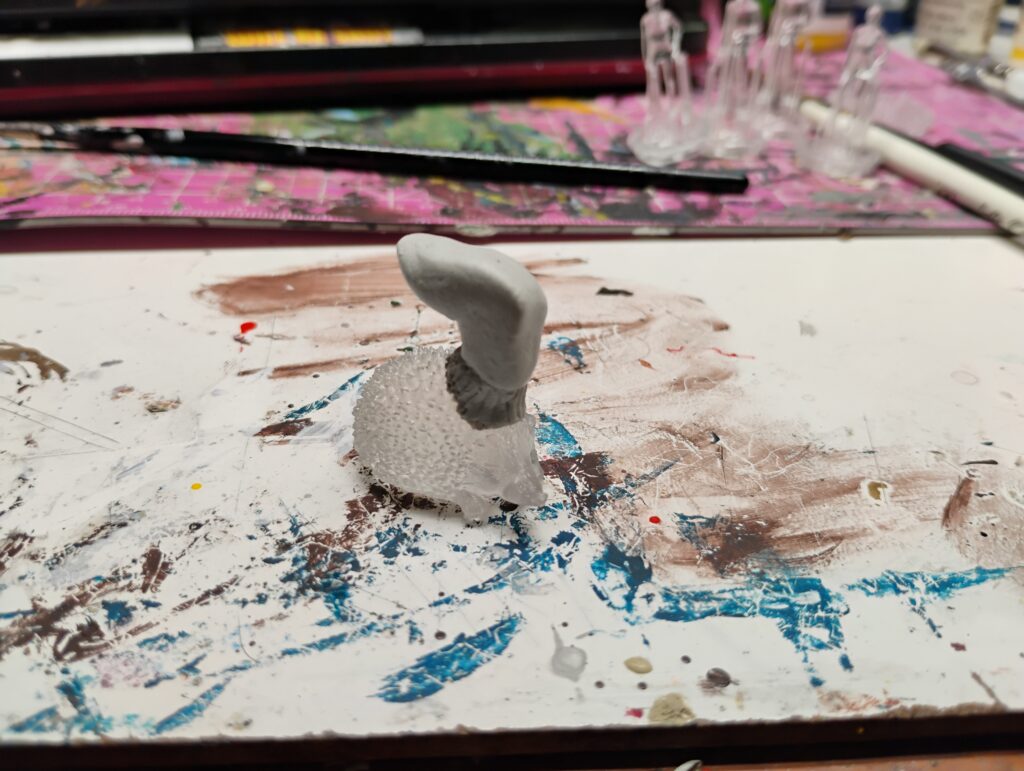
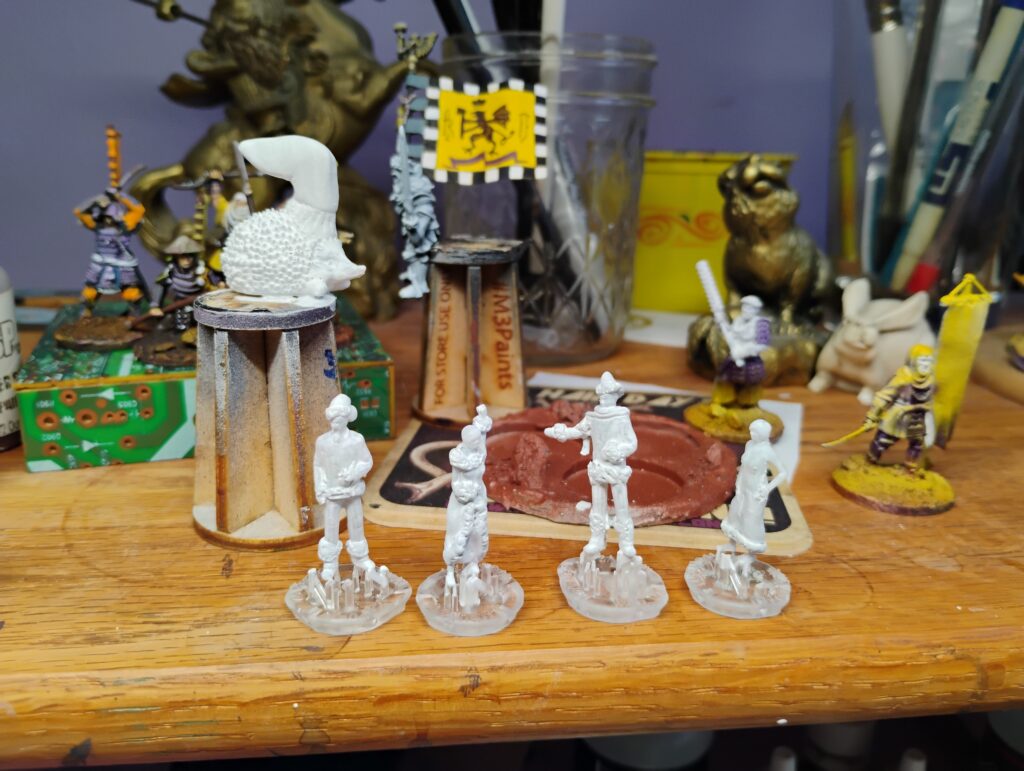
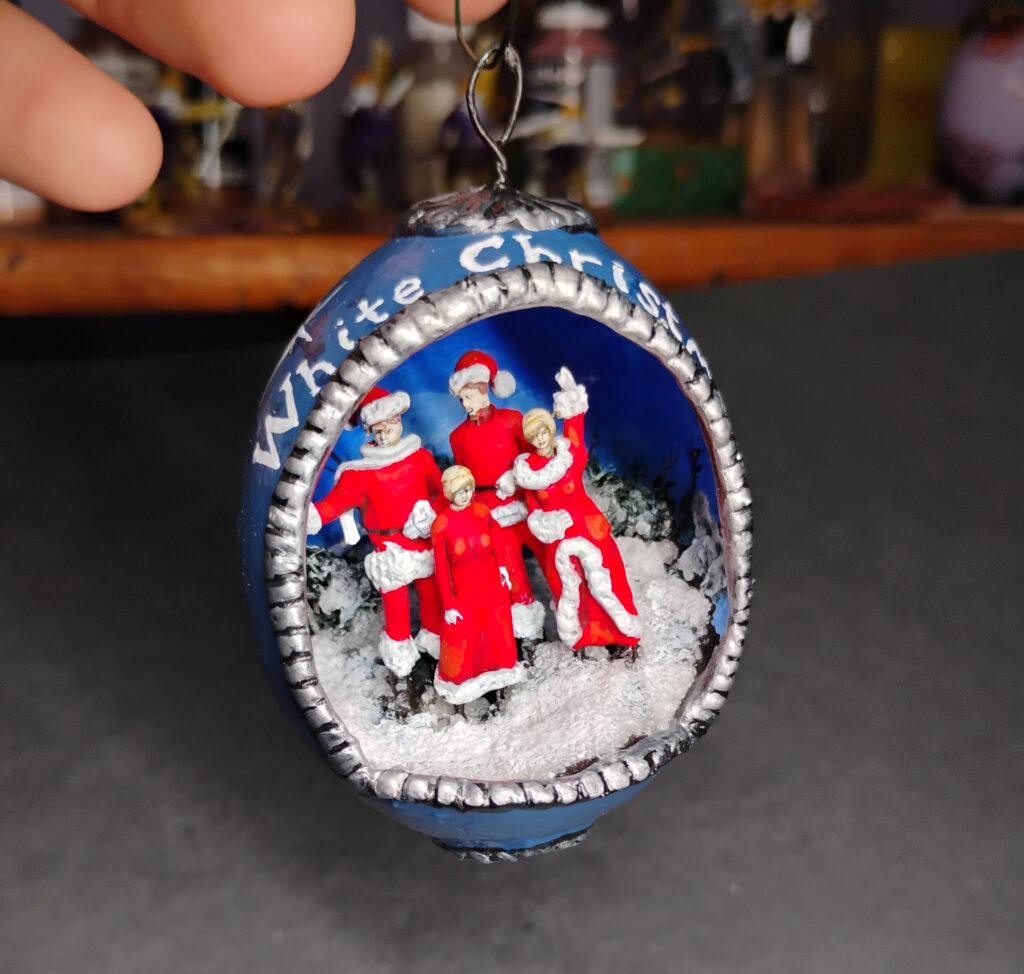
Now, onto the minis! For White Christmas, I needed four figures around 1/72 scale in winter-y clothes with Santa hats, and I tried to roughly match the pose of the boxart. For the Hat, I needed a hedgehog with a sock for a hat. Neither were immediately available to me, so I turned to thingiverse! I manged to find a nice hedgehog model, and a male and female standing miniature I could use as a basic armature. I got those printed.
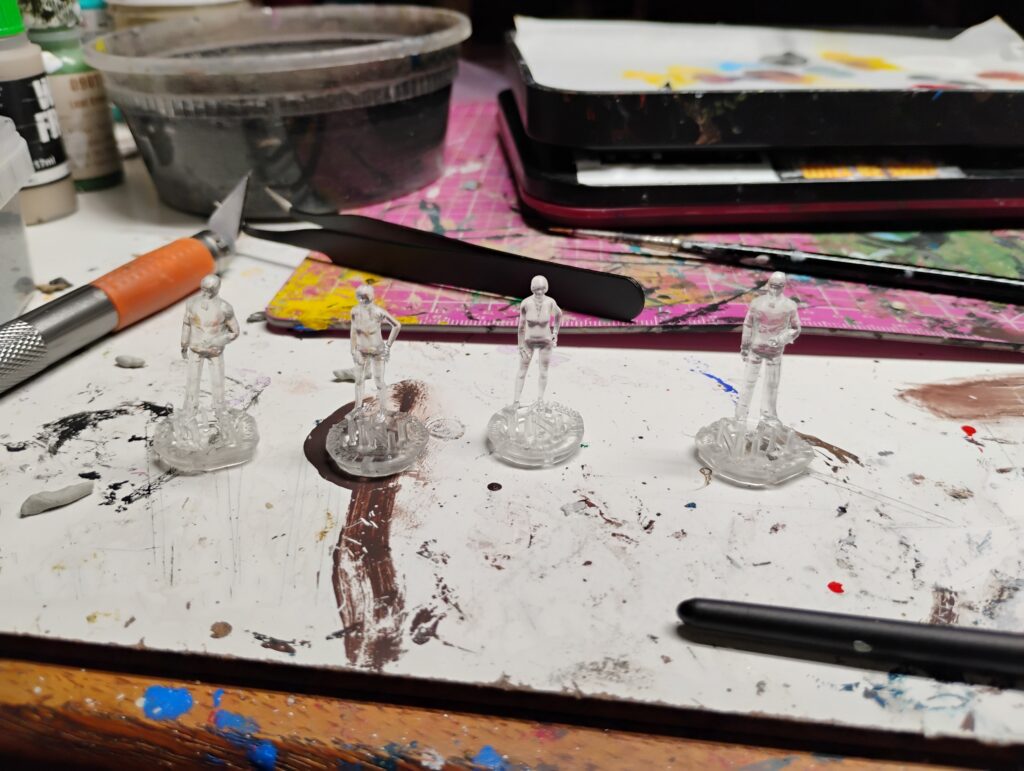
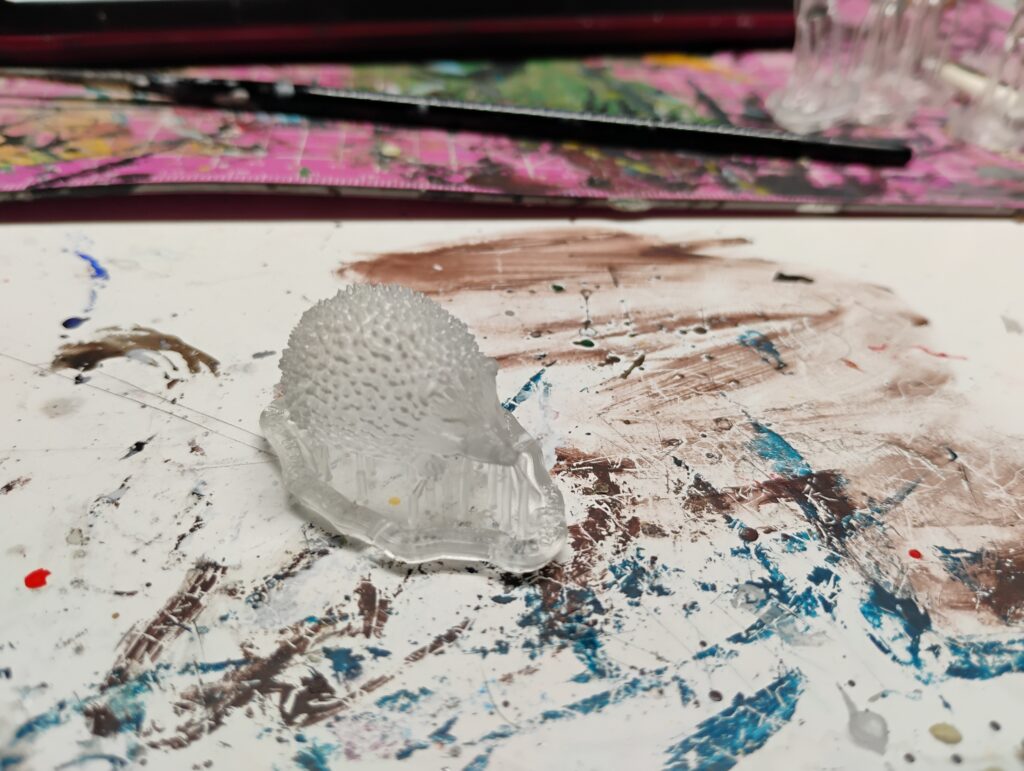
Then onto sculpting! The hat was easy enough, but the humans required some reposing and resculpting, which is always a bit of a challenge with a brittle print.
Painting!
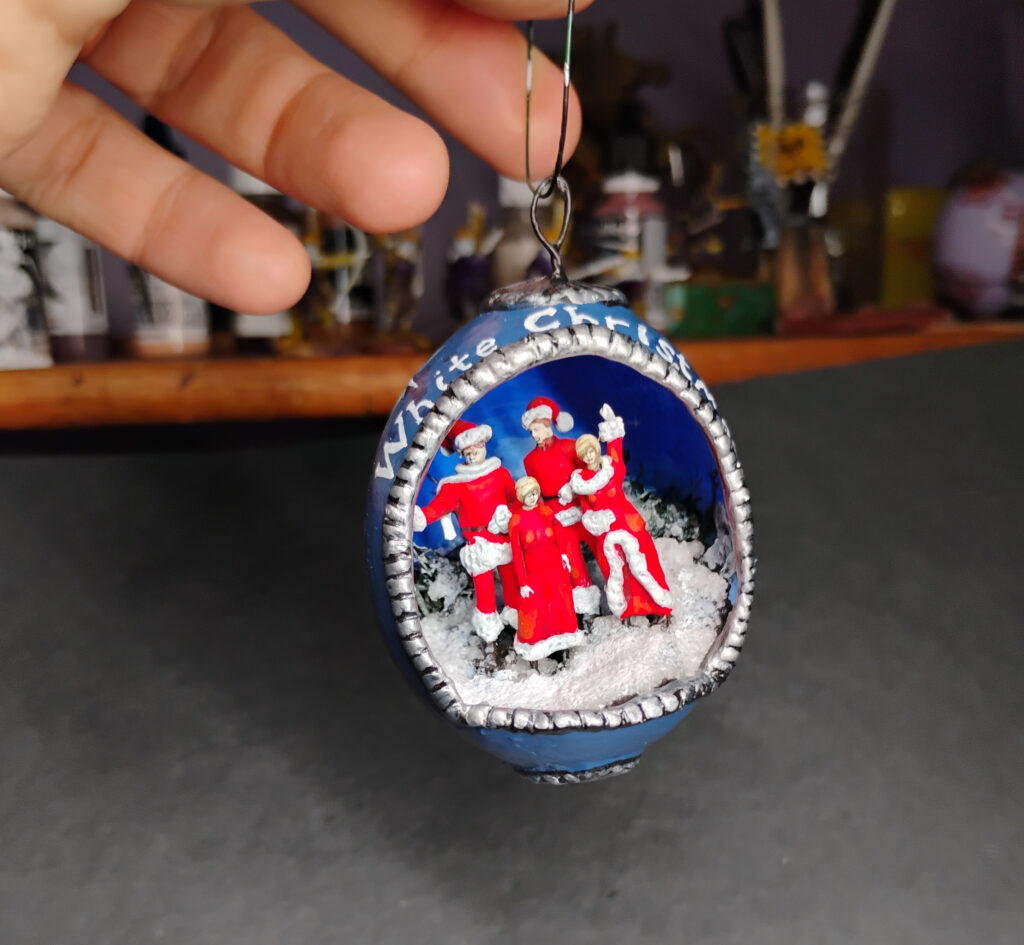
I then painted these like I would most things, with acrylics and different styles. I used some metallics for the trim on the eggs, and sealed everything with a sating brush-on varnish, but only for the outer part of the egg (leaving the inside scene more matte). This will hopefully help protect more during handling as well.
I did the backgrounds first, with some wet blending, and painted the figures separately. These were then glued in, and I used a mixture of Scale 75 snow and PVA glue to blend everything together. I then painted details on the outside!
And here is how they came out- White Christmas
And the Hat

I think this was really fun little project, and well received. Very nice to use minis powers for some good, and do something less militaristic and grimdark.
I definitely might do something like this again, but this one was a little idiosyncratic as these egg ornaments have been in the family for a long time. But perhaps others will be inspired to give it a try!
-BS